Blogia
Just Call Me Angel

MOTO GUZZI

V10 CENTAURO

V10 CENTAURO

http://www.centauro-owners.com/phpBB2/viewtopic.php?p=11586#11586


All the Centauros had the "pump down" front brake problem from new, and it was shared with 1100 Sports and Daytona RS's built in the same 97/98 period. Basically, you can never tell exactly how far the front brake lever is going to move when you pull it. If you really want to get it to come close to the bar you pull, then half-way release, then pull again... and repeat. On many Centautos you can get the front brake lever all the way back to the grip playing that game.

It was probably a piston seal leakage problem designed in by the factory. Brembo stuff was really poor for a period in the 90s. Master cylinder piston seals rely on the pressure of the fluid to seal the lip, so without careful design, when pressure is released a little fluid leaks from high pressure to low, past the seal.

For most people, the usual solution is a new master cylinder. I use the same remote reservoir Nissin master cylinder that everybody used on Ducatis in the 90s to solve a similar problem on Ducatis with Brembo M/Cs. The Nissin was used on all kinds of bikes (Japanese, Triumphs, Cagiva Gran Canyon, you name it) and is high quality, inexpensive, and widely available. The brake feel is vastly improved, with the lever always pulling the same distance for the same pull.

Brembo fixed the problem around 2000, so if you want to stick with Brembo the master cylinders on 2000-on Ducatis and Guzzis are fine too.

Will

PS If the rear brake is fading you are likely using it too much. Think of it as a secondary brake, not to be used for serious, repetitive braking. Also, if you've faded it to the point of boiling fluid and lever moving without resistance, you should change the brake fluid.

V 10 CENTAURO

http://www.centauro-owners.com/phpBB2/viewtopic.php?t=1815&postdays=0&postorder=asc&start=0

V 10 CENTAURO

http://www.jefferies-au.org/MyECU/index.htm


My16M

V10 CENTAURO


Hey all,
Need to replace the front rubber. Wondering what some of you are using to get the front end up for wheel removal. Is there some kind of wheel chock that makes it relatively simple or do I have to lift it from the sump area?


 http://www.centauro-owners.com/phpBB2/viewtopic.php?t=1817

V10 CENTAURO

bising wrote:
Was wondering whether our bikes share the same engine oil used on cars. Referring to TIPS, those names mentioned, eg Castrol GTX, are common engine oil for cars.

Comments?

Tks


Oh good - an oil thread!

Yes in principal - with some minor reservations about the actual specification being more suitable for our 'old fashioned' Guzzi OHV engines. Wink

Why? - Conventional modern motorcycle engines have the engine and gearbox combined in a 'unit' construction. Therefore they must use specialist oils which can deal with the lubrication needs of the engine and also provide the extreme pressure (EP) values required for the gearbox cogs - and often the clutch assembly as well in bikes without dry clutches.

On the face of it this sounds like a good situation - only using one type of oil - until you realise that dedicated motorcycle oils can be much more expensive and almost invariably require changing at more frequent intervals.

As Guzzi engine and transmission assemblies are seperate entities - much the same as old style car assemblies - they can use oils which are formulated to function best in the different units. As you have noted, multigrade 'car' oil in the engine and EP oil in the gearbox and rear drive box. Benefits are lower overall costs of the oils and vastly increased service intervals - for the gearbox and rear drive at least.

I'd add that I feel more than happy that the gears are running in oils designed specifically to give higher shear strength, (85W-140 in my case), than engine oil multigrades.

Something else to consider is that it is being reported more often that the latest synthetic multigrades may not be the best selection for the older design of pushrod type engines - do a search on the forum and elsewhere for the reasons why - so cheaper semi-synthetic or dino oils might be better in our Guzzis with subtle differences between the hi-cams and other 2 valve engines of the same era. I'm sure that some recommendations will follow.


There's a lot of what I think is marketing and regulatory silliness going on with engine oils right now... the bike manufacturers have taken to recommending exorbidantly expensive oils, probably because they are in fact better at handling high temperatures, but equally (I believe) because they have marketing arrangements with the oil manufacturers. They have to get their oil for new bikes from somewhere, and I'm guessing they get it that oil for free if they write the right oil recommendation in the owners manual, and put the right sticker on the crankcase...

I was recently confronted with the spectre of a liter of motorcycle oil on a gas station shelf in Italy for 24 Euro... or roughly 37 US dollars per liter! Around $150 for an oil change! Total insanity from my point of view, and not something I'm going to get involved with. I've run my Guzzis for 100's-of-thousands of miles on what is now $3/quart 20W-50 car oil, and with all the hype right now I choose both the bike to ride and the oil in its crankcase with a certain level of critical thinking... Every bike is different, but marketing in the motorcycle industry has gone off the rails, and into orbit, in alliance with regulations that push towards oil viscosities closer to water than what the engine really wants: 5W oil, regardless of its stability in modern synthetic multigrade form, was not invented because your engine likes it.

That's the way I look at it, and act on it Smile


The Bosch Relay Unraveled

http://www.classictruckshop.com/clubs/earlyburbs/projects/bosch/relay.htm

RECHARGING OF BATTERY

AGM Battery Technology Primer
16 June 2008

General:

AGM (Absorption or Absorbed Glass Mat) battery technology was developed in the 1980's for military aircraft.

In AGM batteries, the acid is absorbed between the "plates" and immobilized by a very fine fiberglass mat.

The "plates" in an AGM battery may be flat like wet cell lead-acid battery, or they may be wound in a tight spiral. Their unique construction (as they are supported in large part by the mat) also allows for the lead in their plates to be purer as they no longer need to support their own weight as in traditional cells.

Some of the liquid material will escape during charging thus decreasing the overall capacity of the battery. The lids (covers) allow safe dispersal of any excess hydrogen that may be formed during overcharge. They are not permanently sealed, but are maintenance free; and they can be oriented in any manner, unlike normal lead-acid batteries which must be kept upright to avoid acid spills and to keep the plates' orientation vertical.

Many modern motorcycles on the market utilize AGM batteries for the combined benefits of reduced likelihood of acid-spilling during accidents, and for packaging reasons (lighter, smaller battery to do the same job, battery can be installed at odd angles if needed for the design of the motorcycle).

Specific things AGM's do not like (i.e. impair their working correctly):

• Parasitic loads - Any small continues load that is on 24x7 such as theft alarms.
• Short rides - Because the battery is difficult to recharge completely, 35 mile (50 kilometers) rides are a minimum. Potentially a once a month ride of 200 miles (300 kilometers) may give enough of a topping off to the charge to keep the battery happy.
• Charging voltages which exceed 15 VDC. Most chargers are not so tightly controlled for over voltage protection.

Things I have found out:

• The cover can be removed.
• Using a syringe distilled water can be added (do not use scented water made for steam irons).
• The water is absorbed slowly so be patient (20 minutes is not abnormal for a couple of ml to be absorbed).
• While charging a discharged battery the battery can handle a high current (20 A for 10 minutes, 10 A for 20 minutes, etc.) and in fact a high current is useful to charge the deep recesses of the battery.

Some people have had very good success augmenting their battery charges with various AGM specific battery tenders that seem to take care of the problems of parasitic loads and short rides.

If you do not have the facility to deliver power to a garage area as is needed with a battery tender you could do what I do!

I have had my battery pronounced dead and used up on several occasions! On each of those occasions I have done the following procedure.

My way:

Equipment and supplies needed:

• A wrench to remove the battery from the bike.
• Distilled water (the cheap good stuff, no scents for steam irons, etc.).
• An old hypodermic needle (look around most play ground areas or contact a junkie).
• A flashlight.
• A plastic bag to protect your table surface from acid.
• A battery charger with a voltage protection, or limiter that kicks in at 15 VDC. Maximum current can go to 20 Amps, but minimum should be at most 2 Amps.
• A Volt meter to check resting voltage.
• A screw driver to carefully pop the cover off.


The procedure:

• Removed the battery from the bike.
• Carefully open the cover of the battery. If you break off a few plastic studs (as I have done) you can use some tape when it comes time to put the cover back on, but be sure to leave some breathing room around the cover (i.e. don’t tape it completely sealed).
• Pop the lids off the cells.
• With a flash light look into the cells.

Any cell that appears to be dry will need some distilled water, I use a hypodermic with the metal needle removed, and I add 4 ml at a time to each cell that appears dry.

1. Add water.
2. Wait 20 minutes.
3. Recheck cells condition.
4. Add water as needed and repeat steps 2 thru 4 until the surface of the cell seems to keep a moist appearance.
5. When the cells stop absorbing distilled water put the charger on at maximum current.

Note: It is possible that the battery will not charge at maximum, do not worry, it may need some TLC. I have dropped the charging rate down to low (trickle, or about 2 A) and monitored the water adding it as needed to maintain the moist appearance of the cells. If you over fill your cells, when the battery is put on high charge, later in the cycle, the excess fluids will bubble out the cell access points (be careful with the bubble over because it is acid).

• If the battery absorbs maximum current (depending on what that is) stop the maximum current at an appropriate time and continue with a trickle charge over night.

I have found that checking the battery every 2 hours while on trickle is sufficient to keep it from going dry, if you apply 4 ml above the barely moist cell condition.

• Until the battery will maintain a 12.x VDC (plus or minus) with the charger leads disconnected over night and has been charged for a period of time between 24 to 48 hours with a trickle and a short duration high current charge it is not up to snuff.
• Let the battery finish off by trickle charging it until you observe the moist (but not wet) cell condition on all cells evenly.

You may need to let the battery charge longer to remove excess water, or add water to some cells as the fluid goes down to get them all looking similar.
Alternative water reduction techniques for the impatient:

• Excessive water that remains on the cells after your battery is fully charged can be removed by putting the metal needle tip back on the hypodermic and sucking the excess water out of the cells.
• Tip the battery upside down in the sink and see what comes out.

BECAREFUL with the fluids that the battery yields via any mechanism, they should be diluted with water and flushed down the pipes because they are acid. It will put a hole in clothes and cause an open cut to burn (leaving a scar).

Most important is not to exceed 15 VDC while charging.

At 160 euro a pop, I have saved myself 480 euros so far with this technique.
_________________
Ken "motts" Applegate, Paris (France not Texas)
AMA, MGCB, MGWC, MGCGB, FEMA Friend
California EV, V10 Centauro GT

V 10 CENTAURO

V 10 CENTAURO


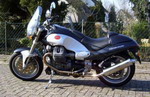
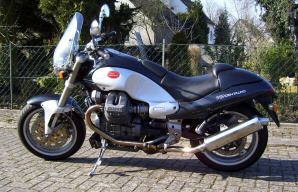
Buenas Plot..., me alegra que poco a poco vayas pillando el "intringulis" técnico..., es muy conveniente si se tiene una Guzzi ...

Bueno, en las "directrices básicas" que te pasaron,  recomiendan ENCARECIDAMENTE (MUST !!!!  ) que conectes la carcasa del regulador al borne negativo de la batería, usa para ello un cable con un grosor mínimo de 4mm . 
Dicen que la ausencia de este cable, genera picos de voltaje que llevarian a la destrucción de la ECU (caja negra)...

Ya sabes, manos a la obra...       Es facil de hacer y te ahorrarás sustos...  

matt


Efectivamente Plot...., se trata del reglaje de válvulas... Recomiendan regular la válvula de admisión a 0,15mm , y la de escape a 0,20mm.

Esto significa dejarla a 0,05mm más de lo descrito en el manual de usuario, pero según dicen, es necesario para garantizar una "estabilidad" a largo tiempo, y mantener los intervalos de mantenimiento cada 10000 kilómetros. Sin ello , incluso a ralentí iría mal...

Estos temas los puedes ir "recopilando" y cuando la lleves al taller le comunicas al paisano que te la deje como tu quieres...

matt


Si sale aceite del frente de la caja del cardan, se debe cambiar el retén del eje... , caben dos retenes !!! 


No sé exactamente a que retén se refiere..., lo mejor es que preguntes cual exactamente , mira el siguiente esquema:


Si el aceite sale de cualquier otro sitio, taladra un pequeño orificio en el tornillo de llenado, conectale un tubito de plástico y posiciona el otro extremo del tubo lo mas alto posible. Yo tengo ese tubo en dirección a la caja de cambio , debajo del asiento, finalizando cerca de la ECU


 Con ese tubito lo que se pretende es crear un "respiradero" para la sobre presión de aceite que pueda haber... , normalmente acaba en algún "recoge-aceites made en casa", como puede ser una lata de coca cola (te sirve tambien cualquier otro refresco  )  Lo vas controlando y cuando esté lleno lo vacias...

Aunque el tema de la sobrepresión no es tan facil como ponerle el respiradero... Lo primero es procurar no llenar demasiado aceite, lo mejor es tener la cantiad justa... , que se mantenga entre mínimo y máximo...
Si echa mucho aceite (incluso teniendo el justo) puede ser indicativo de cilindros gastados ... , éstos al tener mucha holgura, ejercen presión hacia el carter


La horquilla delantera debe rebajarse en 10mm


Se refiere a rebajar la altura de las barras delanteras.... Seguro que así se consigue una mejor conducción. La manera de hacerlo es dejar que las barras "sobresalgan" de la tija 10 milimetros. En la siguiente foto podrás observar como las barras (en color bronce ) sobresalen de la tija..., de esta manera bajas la suspensión delantera:


Cita


No uses jamás pastillas de freno sinterizadas


Seguro que lo dice porque al ser mas duras que las normales, se "comen" el disco de freno muy rápido...


matt


Tema 4
Pinzas de freno: 
Cambia los tornillos estandar de 8.8 que aprietan la mitad de cada pinza frontal de frenos , por unos M8x40mm de tipo "allen" . El par de apriete debe ser de 40 Nm. 
Obtendrás una frenada lineal en vez de decreciente


Se refiere a los dos tornillos que van en la parte frontal de cada pinza (freno delantero).... En la imagen (pinza  izquierda ) verás los huecos donde van...  


matt


Presión de gasolina: Conecta el medidor de presión de gasolina a una de las tomas o a las dos... Incrementará la manejabilidad en cambios de lastre (ver mi descripción de EPROMs ) .

Correa de distribución: Contitech Syncroforce CXP STD 640-S8M-20 con 80 dientes.


TEMA 6:

Nivel de aceite de motor: 10 mm por encima del máximo (con el medidor totalmente enroscado )

Aceite de motor: Sintético  10W60, 1oW50 o 20W60. Nunca 5W... or 0W...

Nivel de aceite de la caja de cambios: Sintético 0,60l.  Olvídate del indicador de nivel.

Nivel de aceite del cardan: Sintético 0,20l. Olvídatte del indicador de nivel

Filtro de gasolina: Mahle KL14, Art. 07637655 o MANN WK 613

Filtro de aceite: MANN W712/52


No estoy muy de acuerdo con el nivel de aceite del motor, yo jamás sobrepasaría el nivel de máximo... , lo mejor es dejarlo un pelín por encima de la mitad y controlarlo a menudo...

Sobre los filtros de aceite, tambien :


> Bloque 1100 (Centauro, Cali, V11, etc... )   
UFI 2328700
CHAMPION   C305 
HIFLO-FILTRO   HF551 (incluso Griso, Stone, Quota... )
Purolator ML17782

Rojo = Alternativos contrastados en la web del fabricante.